OpenCV is rich in libraries for Computer Vision and Machine Learning. One of them is face recognition. With specific algorithms, the machine can detect and recognize faces from the images or videos provided. For large websites, classmates, Facebook, or Google may be familiar with this facial recognition. Google and Facebook have quite capable face recognition and detection system.
In this tutorial, we will try to make a face detection application based on OpenCV. We will make a dataset of photos with various expressions so that our face recognition system is more accurate. Image input directly from our Raspberry Pi camera, so we can make face recognition in real-time.
Then you can develop this face recognition to become wider. For example, detection of a criminal's face, or his own face detector for authentication. Also, actually more development, depending on our imagination, of course.
Preparation
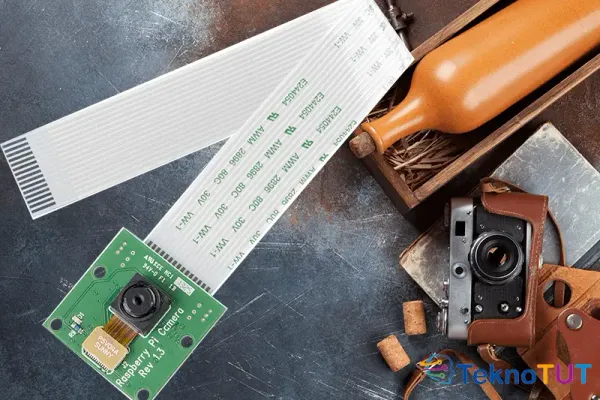
For preparation, you must provide a Raspberry Pi 3 Model B+ (Buy Here) that have OpenCV installed with the Virtual Environment. For how to install OpenCV, please see the previous article Install OpenCV 4 on the Raspberry Pi. You also have to prepare Pi Cam as an input (See the article Preparing the Raspberry Pi Camera). SSH and VNC access may be needed so the program can run properly. Make sure the camera settings are enabled in raspi-config.
Install Library needed
We will install additional libraries for Python3, namely, dlib, face_recognition, and imutils. We will work on the cv environment we have previously created.
workon cv
pip install dlib
pip install face_recognition
pip install imutils
Installing dlib is quite long depending on the internet speed and speed of your SD Card.
If at installation face_recognition you get an error like the following.
ERROR: THESE PACKAGES DO NOT MATCH THE HASHES FROM THE REQUIREMENTS FILE. If you have updated the package versions, please update the hashes. Otherwise, examine the package contents carefully; someone may have tampered with them.
    face-recognition-models>=0.3.0 from https://www.piwheels.org/simple/face-recognition-models/face_recognition_models-0.3.0-py2.py3-none-any.whl#sha256=8d6b0af2e37a17120c3f13107974bc252142a4ffcb4e58eabdfcf26608e52c24 (from face_recognition):
        Expected sha256 8d6b0af2e37a17120c3f13107974bc252142a4ffcb4e58eabdfcf26608e52c24
             Got        b1e8b8472604b9a2f139e51d8413a0c31716d2e5887f07eb8ea84aee894c5890
Try doing a manual installation as below.
wget https://www.piwheels.org/simple/face-recognition-models/face_recognition_models-0.3.0-py2.py3-none-any.whl
pip install face_recognition_models-0.3.0-py2.py3-none-any.whl
pip install --upgrade face_recognition
Programming
For programming, we will use Python by utilizing the Library that was previously installed. 3 main python programs will be created. That is face-encoding.py to encode all faces in the dataset. The second file is face-recognition-img.py to recognize faces with image input. Also, the 3rd face-recognition-video.py file to recognize faces in real-time with video input.
Directory Structure
For the program to be made neat, we must arrange the directory. We will create a project directory in the Raspberry Pi home folder. All projects that we will create will be saved under the project folder.
cd ~
mkdir project
cd project
mkdir face-recognition
cd face-recognition
Next we will work in the ~/project/face-recognition directory. This face-recognition project will require a dataset folder that will contain a face photo that will be detected. Each different face will be stored in a folder with the name of each owner's face.
cd ~/project/face-recognition
mkdir dataset
Source Code
Create a file with the name face-encoding.py in the face-recognition project directory, namely at ~/project/face-recognition.
nano face-encoding.pyThen fill in the following code.
# PENGGUNAAN
# python face-encoding.py --dataset dataset --encodings encodings.pickle --detection-method hog

# import library yang di perlukan
from imutils import paths
import face_recognition
import argparse
import pickle
import cv2
import os

# Parsing Argumen
ap = argparse.ArgumentParser()
ap.add_argument("-i", "--dataset", required=True,
	help="path to input directory of faces + images")
ap.add_argument("-e", "--encodings", required=True,
	help="path to serialized db of facial encodings")
ap.add_argument("-d", "--detection-method", type=str, default="cnn",
	help="face detection model to use: either `hog` or `cnn`")
args = vars(ap.parse_args())

# Ambil gambar dari folder dataset
print("[INFO] mendapatkan model wajah...")
imagePaths = list(paths.list_images(args["dataset"]))

# inisialiassi wajah yang di kenal
knownEncodings = []
knownNames = []

# loop di direktori gambar
for (i, imagePath) in enumerate(imagePaths):
	# Ambil nama dari masing-masing folder
	print("[INFO] Memproses gambar {}/{}".format(i + 1,
		len(imagePaths)))
	name = imagePath.split(os.path.sep)[-2]

	# konversi ke RGB (OpenCV ordering) ke dlib ordering (RGB)
	image = cv2.imread(imagePath)
	rgb = cv2.cvtColor(image, cv2.COLOR_BGR2RGB)

	# deteksi (x, y) koordinat dari kotak wajah
	boxes = face_recognition.face_locations(rgb,
		model=args["detection_method"])

	# Pemrosesan Wajah
	encodings = face_recognition.face_encodings(rgb, boxes)

	# loop semua proses encoding
	for encoding in encodings:
		knownEncodings.append(encoding)
		knownNames.append(name)

# dump the facial encodings + names to disk
print("[INFO] Memproses serialize encoding...")
data = {"encodings": knownEncodings, "names": knownNames}
f = open(args["encodings"], "wb")
f.write(pickle.dumps(data))
f.close()
Save the file. Next, we will create the face-recognition-video.py file in the same directory.
nano face-recognition-video.pyEnter the following code:
# PENGGUNAAN
# python face-recognition-video.py --cascade haarcascade_frontalface_default.xml --encodings encodings.pickle

# import library yang di perlukan
from imutils.video import VideoStream
from imutils.video import FPS
import face_recognition
import argparse
import imutils
import pickle
import time
import cv2

# Parsing Argumen
ap = argparse.ArgumentParser()
ap.add_argument("-c", "--cascade", required=True,
	help = "path to where the face cascade resides")
ap.add_argument("-e", "--encodings", required=True,
	help="path to serialized db of facial encodings")
args = vars(ap.parse_args())

# load pendeteksi wajah dari file cascade OpenCV
print("[INFO] loading encodings + face detector...")
data = pickle.loads(open(args["encodings"], "rb").read())
detector = cv2.CascadeClassifier(args["cascade"])

# Nyalakan Kamera
print("[INFO] Memulai Stream dari Pi Camera...")
vs = VideoStream(src=0).start()
time.sleep(2.0)

# Penghitung FPS (Frame per Second)
fps = FPS().start()

# loop dari semua frame yang di dapat
while True:
	# dapatkan frame, dan resize ke 500pixel agar lebih cepat
	frame = vs.read()
	frame = imutils.resize(frame, width=500)

	# Konversi ke grayscale dan konversi ke RGB
	gray = cv2.cvtColor(frame, cv2.COLOR_BGR2GRAY)
	rgb = cv2.cvtColor(frame, cv2.COLOR_BGR2RGB)

	# deteksi wajah dari frame grayscale
	rects = detector.detectMultiScale(gray, scaleFactor=1.1,
		minNeighbors=5, minSize=(30, 30),
		flags=cv2.CASCADE_SCALE_IMAGE)

   # Tampilkan kotak di wajah yang dideteksi
	boxes = [(y, x + w, y + h, x) for (x, y, w, h) in rects]

	encodings = face_recognition.face_encodings(rgb, boxes)
	names = []

	# loop di semua wajah yang terdeteksi
	for encoding in encodings:
		matches = face_recognition.compare_faces(data["encodings"],
			encoding)
		name = "Unknown"

		# check apakah ada wajah yang di kenali
		if True in matches:
			matchedIdxs = [i for (i, b) in enumerate(matches) if b]
			counts = {}
			for i in matchedIdxs:
				name = data["names"][i]
				counts[name] = counts.get(name, 0) + 1
			name = max(counts, key=counts.get)
		names.append(name)

	# loop di semua wajah yang sudah di kenali
	for ((top, right, bottom, left), name) in zip(boxes, names):
		# tampilkan nama di wajah yang di kenali
		cv2.rectangle(frame, (left, top), (right, bottom),
			(0, 255, 0), 2)
		y = top - 15 if top - 15 > 15 else top + 15
		cv2.putText(frame, name, (left, y), cv2.FONT_HERSHEY_SIMPLEX,
			0.75, (0, 255, 0), 2)

	# Tampilkan gambar di layar
	cv2.imshow("Frame", frame)
	key = cv2.waitKey(1) & 0xFF

	# tunggu tombol 1 untuk keluar
	if key == ord("q"):
		break

	# update FPS
	fps.update()

# tampilkan info FPS
fps.stop()
print("[INFO] elasped time: {:.2f}".format(fps.elapsed()))
print("[INFO] approx. FPS: {:.2f}".format(fps.fps()))

# cleanup
cv2.destroyAllWindows()
vs.stop()
When finished, save the file. We currently have 2 python files in this project directory.
Download the haarcascade file
Next, we will need the default haarcascade file from OpenCV. In this case, we need the haarcascade_frontalface_default.xml file. The haarcascade file is classifier for training objects. In this case, we will only get the face image from the photo stored in the dataset folder or directly taken from the camera. We will download it directly from Github and save it in our project directory.
wget https://raw.githubusercontent.com/opencv/opencv/master/data/haarcascades/haarcascade_frontalface_default.xmlOK, until now, we have finished the coding phase. Next, we will try to make a model.
Train a Model
At this stage, we will collect face photos that will be stored in the dataset folder. You can use photos of your own face for trials. In this experiment, I will make a model for my friend and me. Create a directory with the name of each model that will be trained.
cd ~/project/face-recognition/dataset/
mkdir yanwar
mkdir nunut
mkdir ferdy
Save each photo in the appropriate directory. Photos can be taken from Facebook, or directly from your responder camera with the raspistill command (See: Preparing for the Raspberry Pi Camera). Save photos with various expressions. The more photos saved, the more accurate face detection will be.
After finishing saving photos in each directory, then we will encode the pickle file with the face-encoding.py script that we have created. Run the following command in your project directory.
cd ~/project/face-recognition/
python face-encoding.py --dataset dataset --encodings encodings.pickle --detection-method hog
Wait until the encoding process is complete. Once done, you will find a new file in your directory called encodings.pickle.
Examples of finished directory structures are as below.
(cv) pi@raspberrypi:~/project/face-recognition $ tree
.
├── dataset
│   ├── Ferdy
│   │   ├── 001.jpg
│   │   ├── 002.jpg
│   │   ├── 003.jpg
│   │   ├── 004.jpg
│   │   ├── 005.jpg
│   │   ├── 006.jpg
│   │   ├── 007.jpg
│   │   └── 008.jpeg
│   ├── Nunut
│   │   ├── 001.jpg
│   │   ├── 002.jpg
│   │   ├── 003.jpg
│   │   ├── 004.jpg
│   │   └── 005.jpg
│   └── Yanwar
│       ├── 001.jpg
│       ├── 002.jpg
│       ├── 003.jpg
│       ├── 004.jpg
│       ├── 005.jpg
│       ├── 006.jpg
│       └── 007.jpg
├── encodings.pickle
├── face-encoding.py
├── face-recognition-video.py
└── haarcascade_frontalface_default.xml
Run the Program
After the encoding process is complete, your face detection program is ready for use. Run the following command in the main directory of your project.
python face-recognition-video.py --cascade haarcascade_frontalface_default.xml --encodings encodings.pickleWait until the video appears on the screen. Try to face the camera and see what happens. To run this program, you must use a monitor on your Raspberry Pi. Alternatively, you can use VNC. See the article How to Install Raspberry Pi in Headless for how to activate VNC.
Follow approximately as in the video below. As you can see, the results are less accurate. This may be because the coding uses the HOG method, the CNN (Convolutional Neural Network) method cannot be done on a Raspberry Pi engine. Next, we will try with the CNN method using Server.
Conclusion
The Facial Recognition project that we created is still a simple project. However, this project is the entrance to the wider world of Computer Vision. We hope that new ideas will emerge after successfully creating this project.
In a separate article, we will try to do another project based on Computer Vision. Continue to follow TeknoTut to learn more.