Installing Raspberry Pi with NOOBS (New Out of Box Software) is the easiest way to install Raspberry Pi. The Raspberry Pi is designed with all the ease of installation and configuration to be easily understood by users, including new users who have never installed the OS.
Unlike headless installations, NOOBS installations require standard I/O devices such as a mouse, keyboard and monitor. This installation method is not complicated because the configuration is done in the user interface that is easy to understand.
Preparation
Following are some preparations in the form of hardware or Software to start the installation with NOOBS.
- 1 Unit of Raspberry Pi 3 Model B+ (Buy Here)
- 1 Power Supply Unit suggested above 1A (Buy Here).
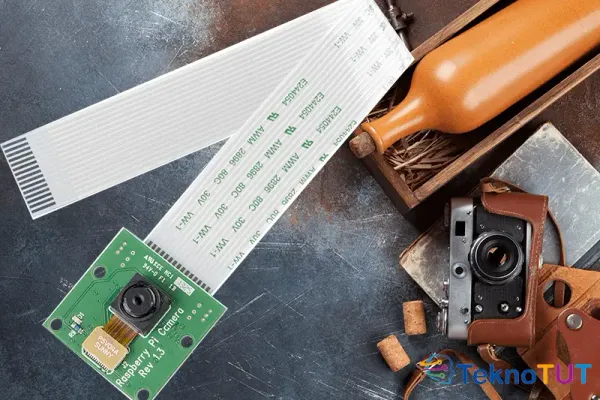
- Micro SD 8GB or more, recommended class 10 (Buy Here).
- Card Reader that supports Micro SD (Buy Here).
- Monitor that supports HDMI (Buy Here).
- Keyboard and Mouse with USB Interface (Buy Here).
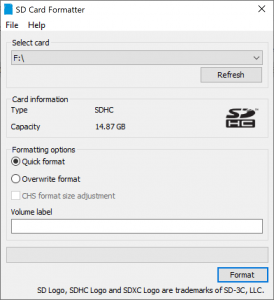
- SD Formater Software. Please download via this link.
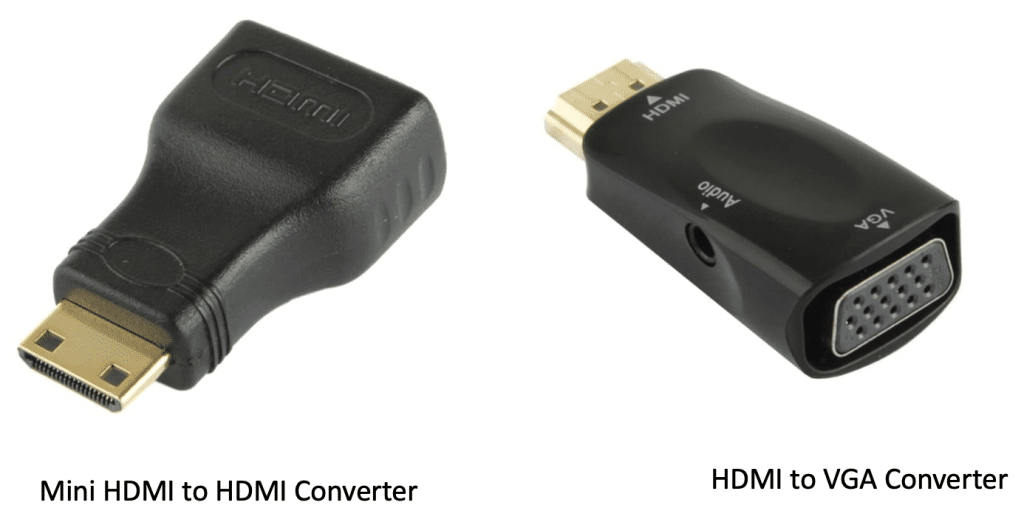
If you use Raspberry Pi Zero, you need a Mini HDMI to HDMI female adapter converter (Buy Here). Many are available in various online stores. The price is around $5 to $11.
If you have a monitor with a VGA port, you can use an HDMI to VGA converter (Buy Here). The price is around $5 to $15.
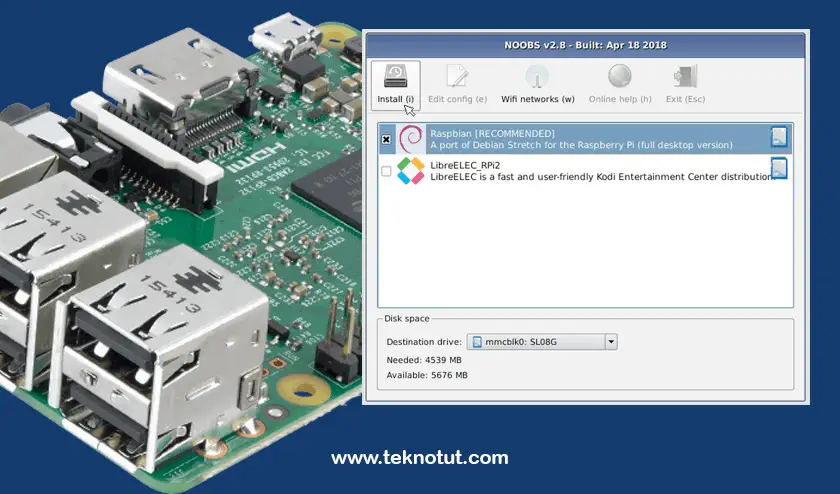
In this experiment we use Raspberry Pi 3 Model B+, with NOOBS version v 3.0.1 full (Offline).
Preparation of NOOBS and Micro SD
Install SD Formater on your PC, after installing, format the SD card with the Software.
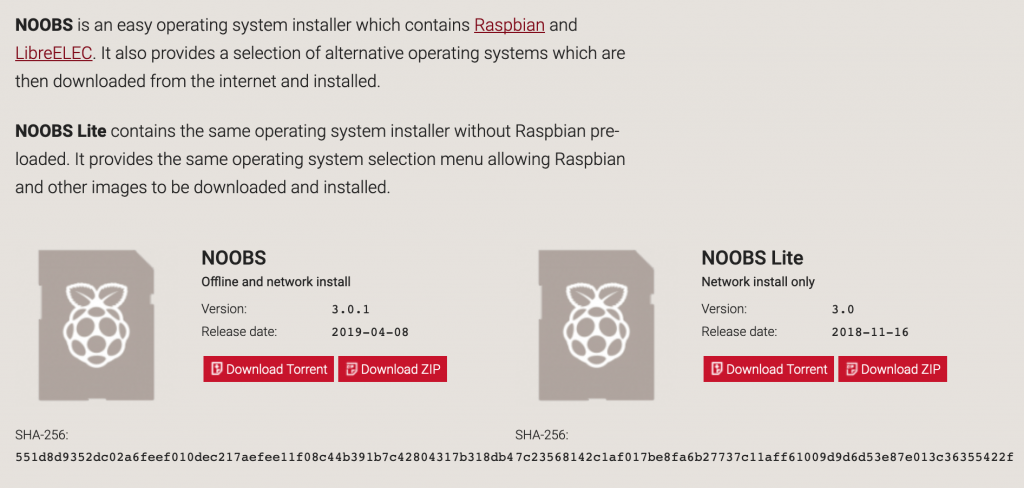
Then download NOOBS from the official Raspberry Pi website. To download, please click here. There are two versions of NOOBS, namely NOOBS and NOOBS lite. The difference is, for NOOBS lite, you have to use the internet during the installation process. For full NOOBS, the installation process will be done offline.
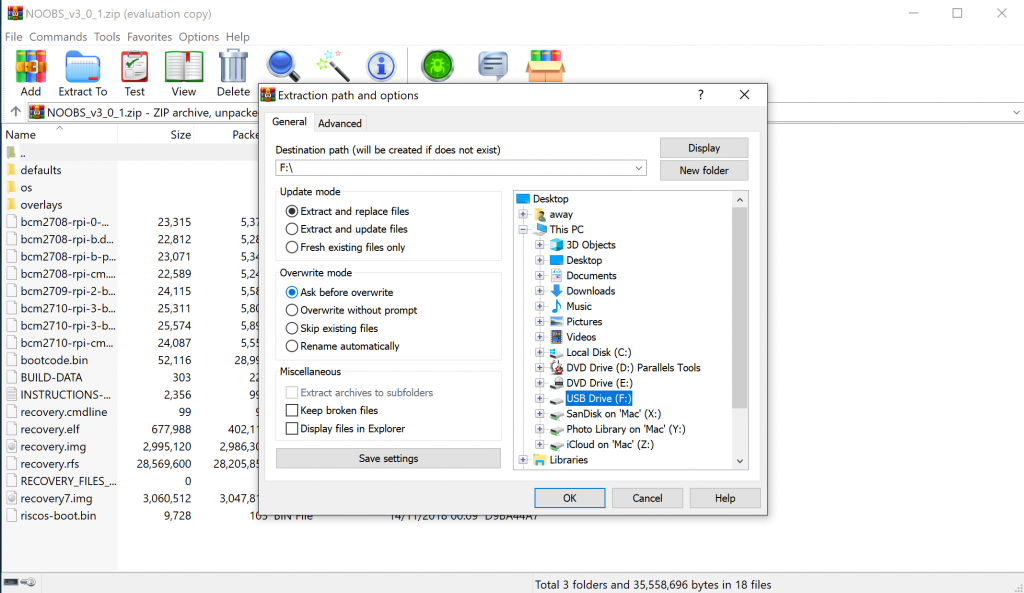
After successfully downloading, please extract the file directly to the Micro SD that has been formatted before. Actually, you can extract files in any folder, and copy the results to Micro SD. However, it is not efficient and does not save time.
When finished, your Micro SD is ready to use. Eject micro SD from your PC.
Installation Process
Enter Micro SD into your Raspberry Pi. Prepare the monitor to the HDMI port, mouse, and keyboard embedded in the USB port. Then turn on your Raspberry Pi. Wait for the next instruction on your monitor screen.
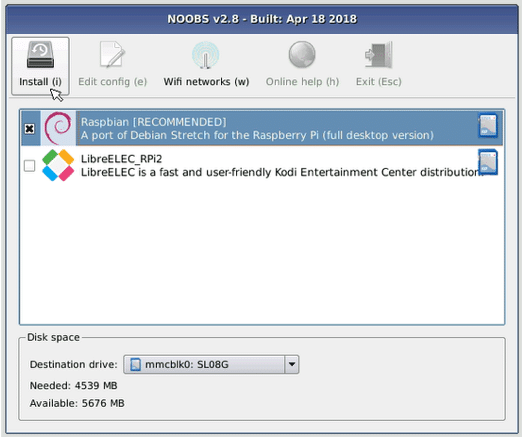
After the Installation option appears above, check the Raspbian [RECOMMENDED] option, then click on the Install button. The system will install, wait until it's finished. The time needed varies, depending on your Micro SD type. In our experience using Sandisk 16GB Class 10 98MB/s Micro SD, the installation process takes around 30 minutes.

Initial Configuration
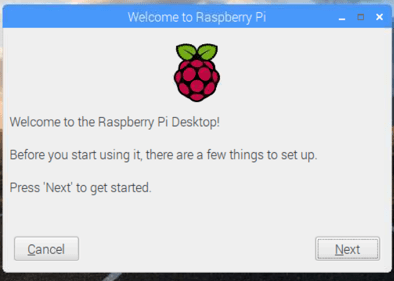
After the installation process is complete, then we will do the initial configuration. The process is very easy because you only have to follow the wizard in your Raspbian interface. At the initial stage, you will get a welcome display from Raspbian. Press the Next button to start.
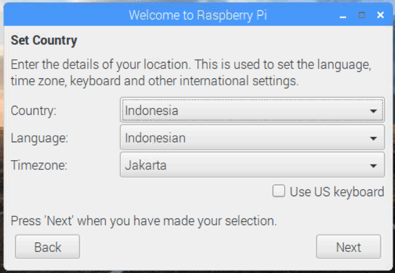
Setting Region, Language, and Timezone
Next, you will be asked to choose Country, language, and timezone. In this experiment, we chose Indonesia with Indonesian and Timezone Asia/Jakarta. Then press Next.
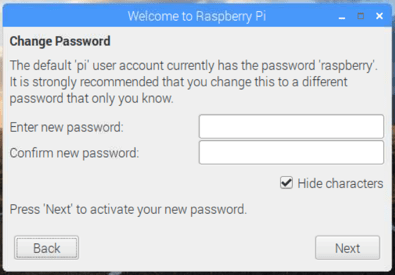
Password settings
Next, you will be asked to set a password. Please type the password as you wish. If you don't want to change the password, just clear it, then press Next. The default password for Raspbian is raspberry with username pi.
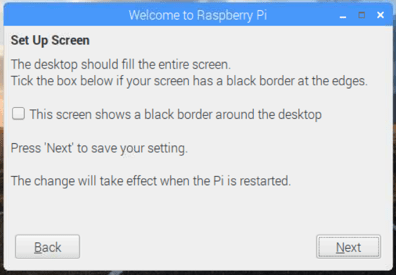
Black Border Configuration
In the next configuration, you will configure the screen resolution. If on your monitor there is a black border, please check the option "This screen shows a black border around the desktop". Raspbian will automatically configure the screen resolution that matches your monitor after restarting later.
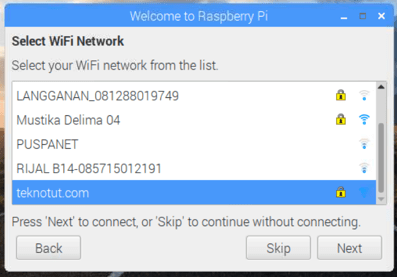
Select and Connect Wifi
At this stage, please select your wifi network, and enter the appropriate password so that your Raspberry Pi is connected to the internet.
Software Update
The last step of the initial wizard is the update option. Select Next to update the Software. Next, you will be asked to restart your Raspberry Pi. Press on the Reboot button. Then wait for your Raspberry Pi to boot. Your Raspberry Pi is ready to use.
For details on how to install, you can see the video below.
Conclusion
The installation process using NOOBS is indeed very easy, and there are not too many complicated configurations compared to how to install with Headless. However, you must prepare a monitor that supports HDMI and input devices such as the mouse and keyboard.
Judging from the way and time efficiency, Install NOOBS is very fast and easier to understand. However, in terms of usage and equipment, it is easier to install headless.