Plex Media Server is an application that functions as a personal multimedia center server. If you like to collect movies, music, or photos that are usually collected on the hard disk. With Plex, you can save everything on the server. Furthermore, all multimedia can be accessed from all devices such as smart TVs, laptops, mobile phones, tablets, and others using an internet connection.
Get to know Plex Media Server
At first, Plex was created as a hobby project from Elan Feingold when he wanted to move XBMC (One of the media servers also known as Kodi) to Mac devices around 2003. Until now, Plex has been used as an alternative to Kodi. Also, it has developed rapidly into a large enough company.
If you have used Netflix, Hulu, Iflix to watch your favorite movies and dramas. Spotify or Joox to listen to your favorite music. Plex is a combination of all of them. With Plex, you can build an entire multimedia server and can be accessed from anywhere and any time of all your devices. Very interesting, isn't it?.
Plex Media Server Features
Different if you collect multimedia on the hard disk. All data in the form of files, you cannot see a brief synopsis of the movies of your choice. Can't see who are the actors/actresses of the Movies. Plex prepares everything. You only have to save the movie file. Plex will search their database or 3rd party databases such as TMDB (The Movie Database) or others. Metadata checking is done automatically by the Plex system.
Some of Plex Media Server excellent features include.
Automatic Metadata
As explained earlier, the automatic metadata feature will make it easier for us to search for multimedia files. The system will automatically search the database for all data needed, such as posters, trailers, actors/actresses, directors, and others. The result is a listing of finished data. We can do a search using the artist's name or based on the name of the director. Also, Plex will automatically display the IMDB rating and the year of making the movie.
Automatic Transcode
Well, this feature is useful if you are watching with an inadequate internet connection. Plex will automatically convert files to keep them fast when playing. Maybe you've opened youtube, and suddenly the resolution changes smaller. Approximately this is the automatic transcode feature.
Automatic Subtitles
This is equally important. Plex Media Server will automatically download subtitles that match the language you choose. Currently, the provider provided is OpenSubtitle. So we don't have to bother looking for subtitles, downloading and storing them. Plex automatically finds it for us.
Multi-Device
Amazingly, even though the Plex server settings are web-based. All multimedia will be accessible from all devices and OS. Even Plex can be played on PlayStation and Xbox One devices.
Plex installation
To install the Plex media server is quite easy. We will try to install using the docker container. With just a few commands, we will have our own multimedia server.
Preparation
Following are some of the needs that must be prepared for Plex installation.
- Physical server or VPS installed Docker. For how to install Docker, please see the article What is Docker.
- Internet connection
- Plex account. Please register the Plex account first through the site https://www.plex.tv/.
Plex can be installed on a digitalocean vps. You can get $200 free credit if you sign up from the link below.


Installation Process
Before installing, please generate an installation claim code that can be found on the https://www.plex.tv/claim/ page. Copy the generated code, and then we will use it for the installation process.
After the code is obtained, log in to your server with root access, then type the following code.
docker run \
-d \
--name plex \
-p 32400:32400/tcp \
-p 3005:3005/tcp \
-p 8324:8324/tcp \
-p 32469:32469/tcp \
-p 1900:1900/udp \
-p 32410:32410/udp \
-p 32412:32412/udp \
-p 32413:32413/udp \
-p 32414:32414/udp \
-e TZ="Asia/Jakarta" \
-e PLEX_CLAIM="YOURCLAIMCODE" \
-e ADVERTISE_IP="YOURIPADDRESS:32400/" \
-v /plex/database:/config \
-v /plex/transcode/temp:/transcode \
-v /plex/media:/data \
plexinc/pms-docker
From the above code, we will install the Plex image by mapping the volume in /plex/database to the config folder, /plex/transcode/temp for the transcode, /plex/media folder for the data folder. Then if you want to change the configuration, see the transcode results or add media files can be directly from the host in the folder that we have set.
For YOURCLAIMCODE, replace with the installation claim code that you have generated before. And for YOURIPADDRESS, change to use your server's IP address. In the above installation, we will set port 32400 which is the default Plex port for web-based access.
Wait until the installation is complete. When finished, the system will boot for a long time, usually around 1 minute. After 1 minute, try to open the browser and type the address YOURIPADDRESS:32400, if it isn't already open, wait a few more minutes.
Plex Initial Settings
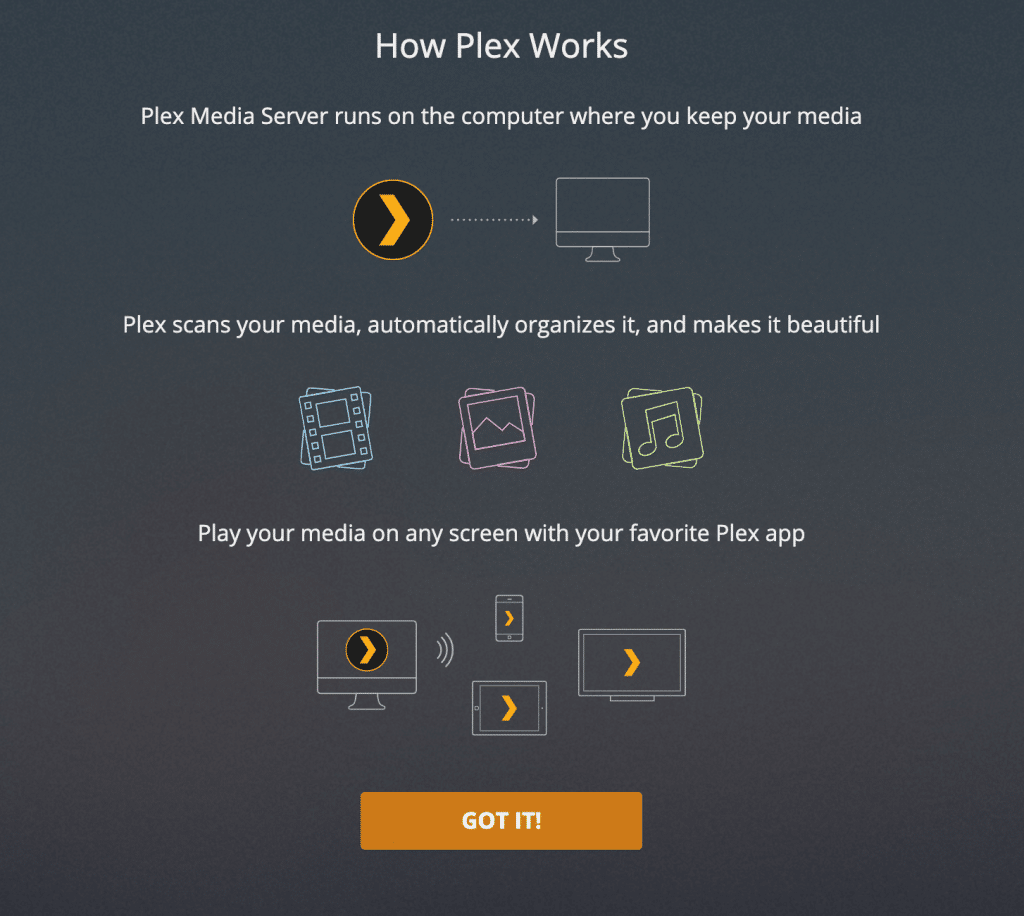
After the web can be opened, you will be asked to log in. Please log in using your Plex account. After successfully logging in you may be faced with a popup containing an invitation to subscribe to Plex Pass. Please ignore by clicking close. If your server is ready, you will be directed to the initial settings page, click on the Got It button.
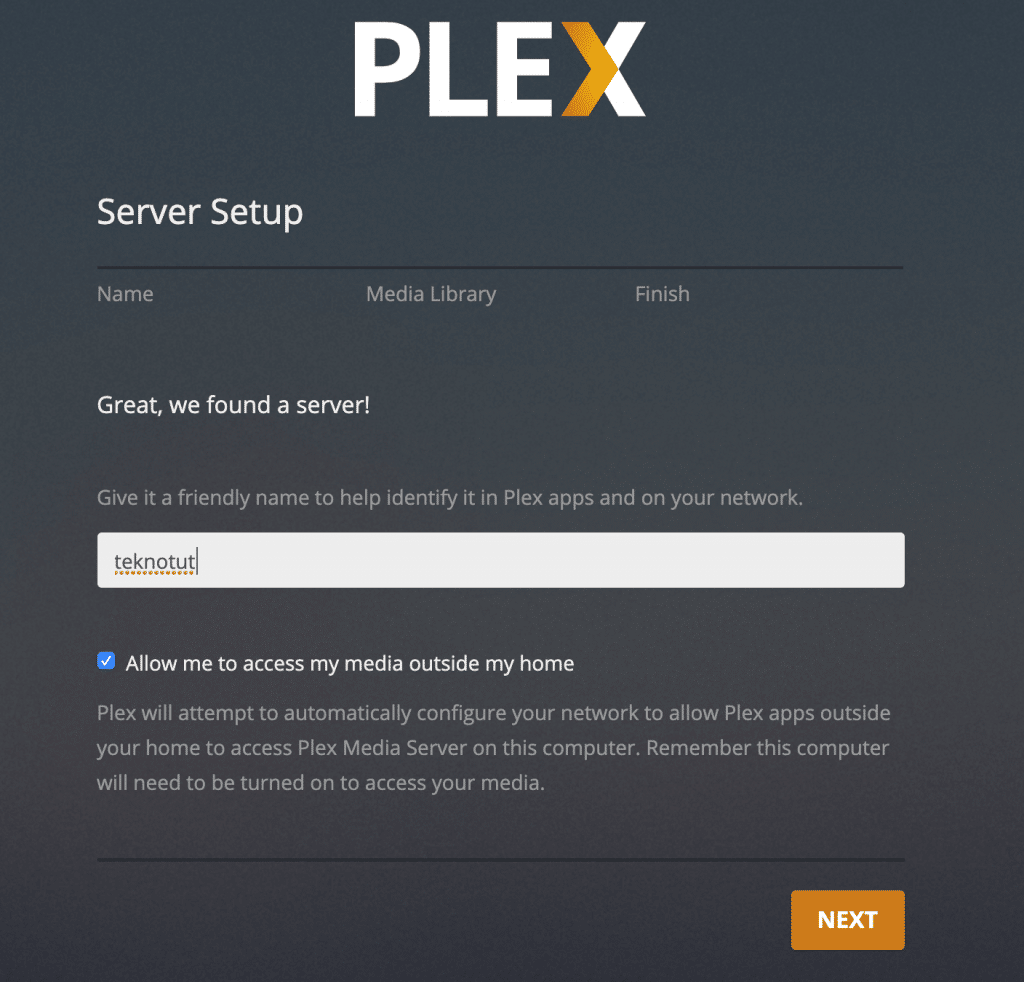
Next page, you will be asked to enter your Plex server name. Please change with the name as you wish. In this experiment, we will enter the name teknotut.
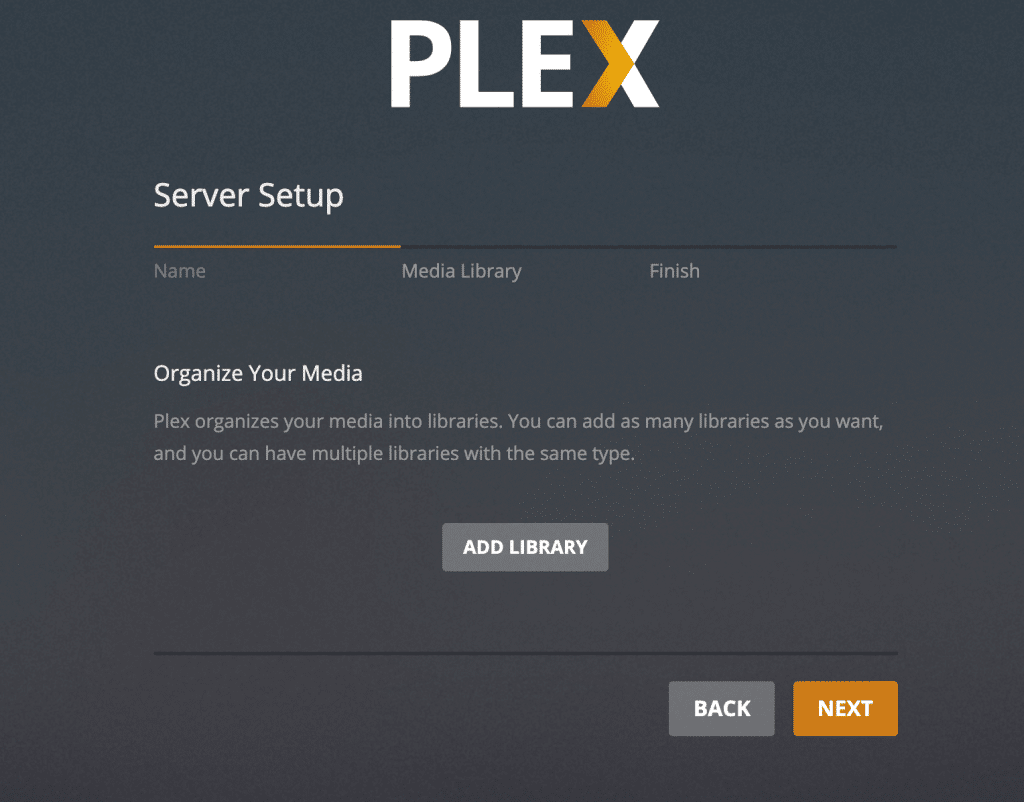
Next is the Server Setup setting, you are asked to select the library file, but this can be ignored, and we will set it later. Click on the Next button, then click Done.
Next, we will do the initial settings, for example, the language selection subtitle and the selection of agents to scan the data. Click on the Settings menu -> Agents -> Movies -> Plex Movies. Check the OpenSubtitles item, then click the gear setting icon.
Enter your opensubtitle username and password. Then choose the main language and the second language. For example, the main language is Indonesian, and the second language is English. Oh yes, before you have to have an account openesubtitles, please register via the web www.opensubtitles.com, it's free.
We discussed only the basic settings, then please explore yourself. Next, we will try to add to the library.
Add Library Folder
The library folder, basically is where we store multimedia files, we only need to point to the folder we choose. As an example, I will add the movie folder in the folder /plex/media that we previously mapped. Type the following command to create a folder.
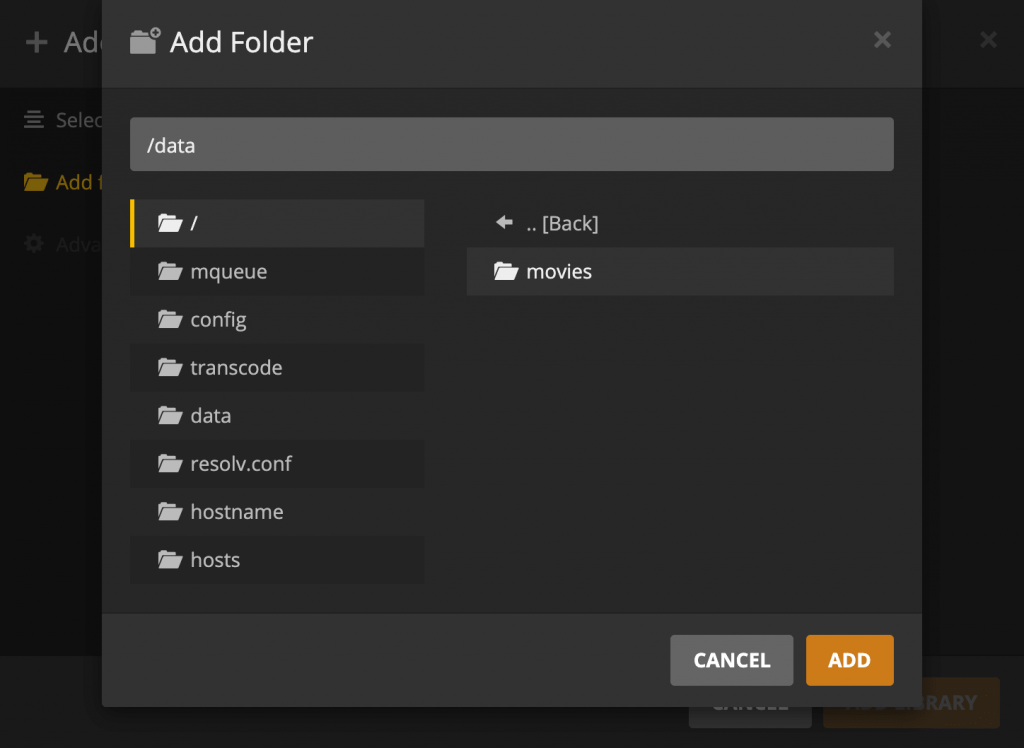
mkdir /plex/media/moviesTry to fill in some movie files in the folder, so that later you can directly scan the Library by Plex. In this example, we will try to save a movie file in the movie folder. Then click on the Manage -> Libraries menu, then click Add Libraries.
Select Movies Type, let the name just Movies then click Next. Click on the BROWSE FOR MEDIA FOLDER button, then select the /data/movies folder, click Add then Add Library. Then Plex will automatically scan, wait until it's finished.
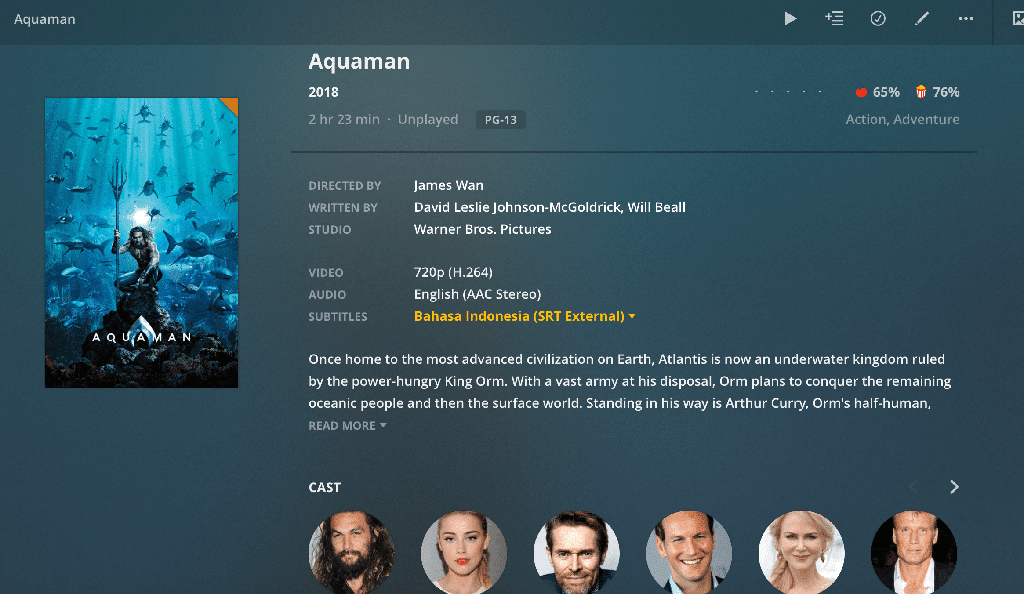
You can see Scanning results by going to the Home menu, then clicking on the Movies menu. You will see the movie data that you input, complete with synopsis, player, rating, and even subtitles that are ready to play. Easy isn't it?.
Then you can directly play the movie via the web. Alternatively, you can install the Plex application on an iPhone or Android, or even on an Android TV.
Conclusion
Plex Media Server is an excellent application for creating centralized multimedia files. Unfortunately, in the free version, you will get a limitation when watching on a cellphone. However, it will still be normal if watched through the web or smart TV. If you want no limit when watching on a cellphone, you must subscribe to Plex Pass for $ 4.99 / month or $ 119.99 for life.
We hope this article is useful.