Raspberry Pi 3 Model B+ sudah dilengkapi dengan interface DSI (Display Serial Interface) dan CSI (Camera Serial Interface). Untuk Raspberry Pi 3 Model B+ anda bisa langsung menggunakan kabel ribon 22 pin agar terkoneksi dengan kamera. Khusus Raspberry Pi Zero, saat ini sudah terdapat Interface CSI, anda bisa menggunakan kabel ribon 14 pin to 22 pin.
Aplikasi kamera Raspberry Pi sangat luas. Raspberry Pi bisa digunakan hanya untuk jeprat jepret foto, merekam video, kamera cctv hingga ke aplikasi kamera pintar.
Pada artikel kali ini kita akan membahas tentang mempersiapkan kamera raspberry Pi dan penggunaannya dengan beberapa perintah dasar.
Persiapan
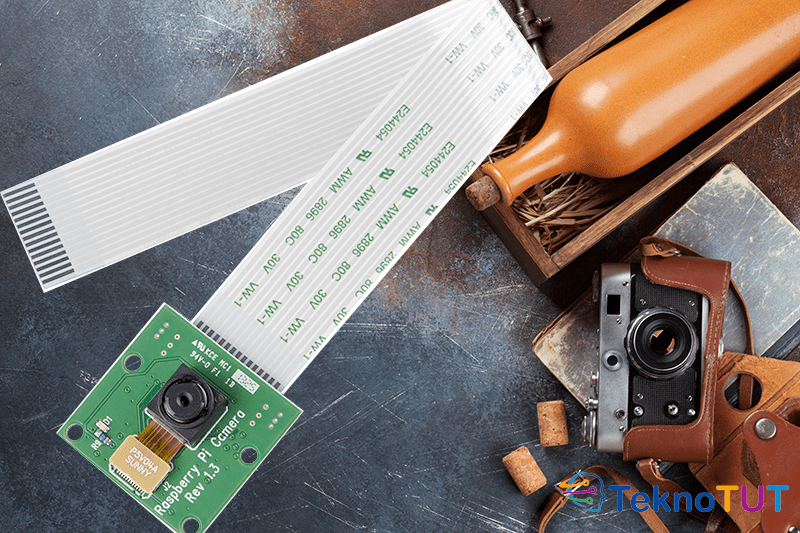
Berikut adalah beberapa alat yang harus di persiapkan.
- Unit Raspberry Pi Model B+ fresh install.
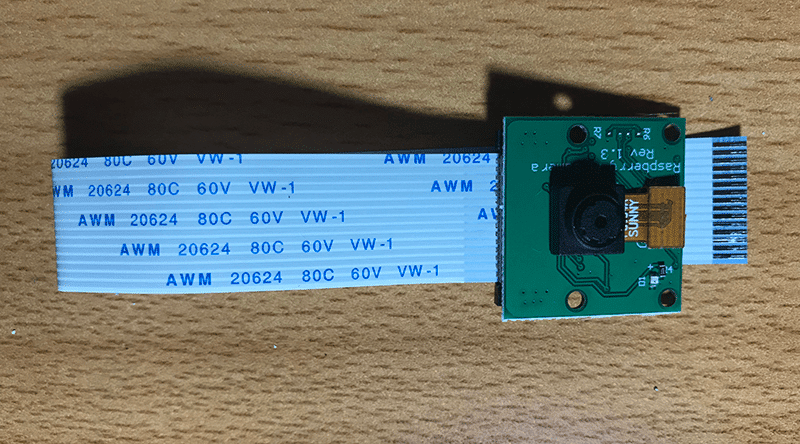
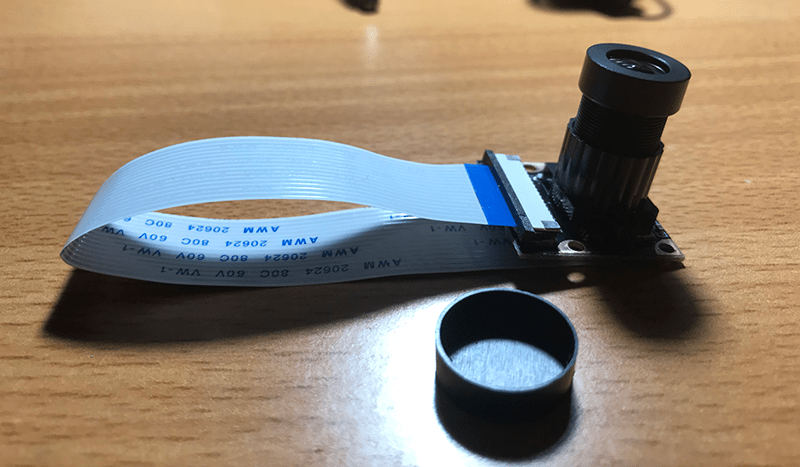
- Pi Camera
- Kabel Ribbon 22 Pin
Jika anda menggunakan Raspberry Pi Zero, anda bisa menggunakan kabel ribon 15 to 22 pin. Apabila anda membeli casing original Pi Zero, anda akan mendapatkan kabel ini.

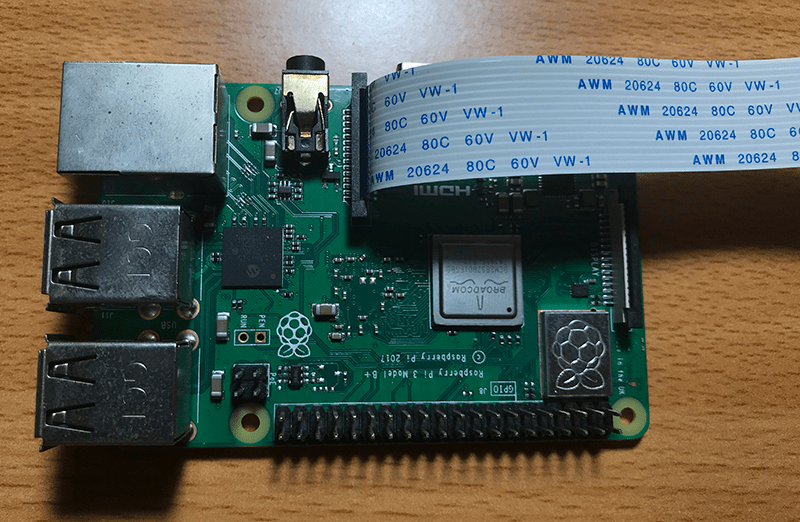
Pemasangan Kamera
Pasang kabel ribon kamera ke interface CSI seperti pada gambar di bawah ini.
Konfigurasi
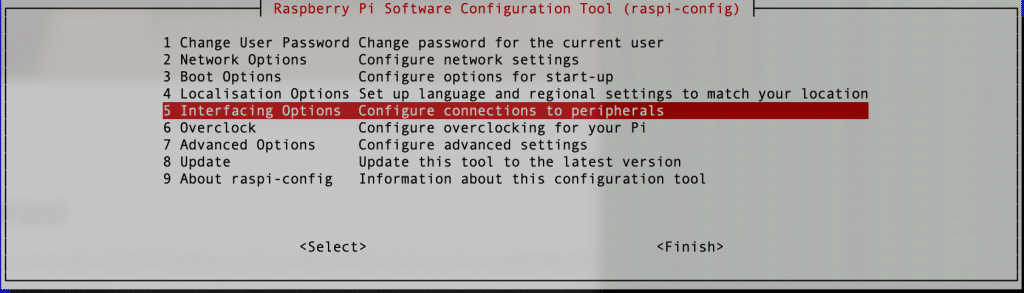
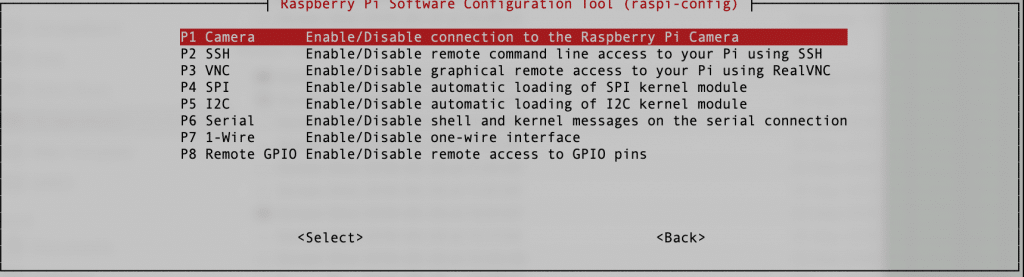
Jika anda baru saja menginstall Raspberry Pi anda. Anda harus mengaktifkan kamera terlebih dahulu dari konfigurasi alat.
sudo raspi-configPilih pada Interfacing Option lalu P1 Camera lalu Yes atau Ya.
Jika sudah selesai pemasangan dan konfigurasi, selanjutnya anda bisa langsung menggunakan Pi Camera untuk mendapatkan foto, atau merekam video.
Menggunakan Kamera
Raspbian menyediakan perintah dasar untuk melakukan take foto dan merekam video. Anda bisa mengeksekusi dari terminal ataupun ssh.
Mengcapture Foto
Untuk melakukan capture foto, anda bisa menggunakan perintah raspistill. Contohnya seperti di bawah ini.
raspistill -O fotopertamaku.jpgPerintah di atas akan mengambil gambar dari kamera dan di simpan dengan nama file fotopertamaku.jpg. File akan disimpan di direktori saat ini. Untuk menyimpan foto di direkrori yang anda tentukan anda bisa langsung mengetikan nama direktorinya. Misalnya kita akan mengambil gambar dari kamera dan di simpan di folder ~/Pictures. Maka, ketik perintah berikut.
raspistill -O ~/Pictures/fotoku1.jpgraspistill juga menyediakan vertikal flip dan horizontal flip. Anda bisa mencoba dengan perintah berikut, dan lihat perbedaan hasilnya.
raspistill -vf -o ~/Pictures/vf.jpg
raspistill -hf -o ~/Pictures/hf.jpg
Masih banyak opsi-opsi lainnya dengan perintah raspistill ini. Untuk mengetahui semua opsi yang tersedia, anda bisa mengetikan perintah di bawah ini.
raspistill 2>&1 | lessSemua opsi yang tersedia di raspistill adalah:
"raspistill" Camera App (commit 7cbfbd38d982 Tainted)

Runs camera for specific time, and take JPG capture at end if requested

usage: raspistill [options]

Image parameter commands

-q, --quality	: Set jpeg quality <0 to 100>
-r, --raw	: Add raw bayer data to jpeg metadata
-l, --latest	: Link latest complete image to filename <filename>
-t, --timeout	: Time (in ms) before takes picture and shuts down (if not specified, set to 5s)
-th, --thumb	: Set thumbnail parameters (x:y:quality) or none
-d, --demo	: Run a demo mode (cycle through range of camera options, no capture)
-e, --encoding	: Encoding to use for output file (jpg, bmp, gif, png)
-x, --exif	: EXIF tag to apply to captures (format as 'key=value') or none
-tl, --timelapse	: Timelapse mode. Takes a picture every <t>ms. %d == frame number (Try: -o img_%04d.jpg)
-fp, --fullpreview	: Run the preview using the still capture resolution (may reduce preview fps)
-k, --keypress	: Wait between captures for a ENTER, X then ENTER to exit
-s, --signal	: Wait between captures for a SIGUSR1 or SIGUSR2 from another process
-g, --gl	: Draw preview to texture instead of using video render component
-gc, --glcapture	: Capture the GL frame-buffer instead of the camera image
-bm, --burst	: Enable 'burst capture mode'
-dt, --datetime	: Replace output pattern (%d) with DateTime (MonthDayHourMinSec)
-ts, --timestamp	: Replace output pattern (%d) with unix timestamp (seconds since 1970)
-fs, --framestart	: Starting frame number in output pattern(%d)
-rs, --restart	: JPEG Restart interval (default of 0 for none)

GL parameter commands

-gs, --glscene	: GL scene square,teapot,mirror,yuv,sobel,vcsm_square
-gw, --glwin	: GL window settings <'x,y,w,h'>

Common Settings commands

-?, --help	: This help information
-w, --width	: Set image width <size>
-h, --height	: Set image height <size>
-o, --output	: Output filename <filename> (to write to stdout, use '-o -'). If not specified, no file is saved
-v, --verbose	: Output verbose information during run
-cs, --camselect	: Select camera <number>. Default 0
-md, --mode	: Force sensor mode. 0=auto. See docs for other modes available
-gps, --gpsdexif	: Apply real-time GPS information to output (e.g. EXIF in JPG, annotation in video (requires libgps.so.22)

Preview parameter commands

-p, --preview	: Preview window settings <'x,y,w,h'>
-f, --fullscreen	: Fullscreen preview mode
-op, --opacity	: Preview window opacity (0-255)
-n, --nopreview	: Do not display a preview window

Image parameter commands

-sh, --sharpness	: Set image sharpness (-100 to 100)
-co, --contrast	: Set image contrast (-100 to 100)
-br, --brightness	: Set image brightness (0 to 100)
-sa, --saturation	: Set image saturation (-100 to 100)
-ISO, --ISO	: Set capture ISO
-vs, --vstab	: Turn on video stabilisation
-ev, --ev	: Set EV compensation - steps of 1/6 stop
-ex, --exposure	: Set exposure mode (see Notes)
-fli, --flicker	: Set flicker avoid mode (see Notes)
-awb, --awb	: Set AWB mode (see Notes)
-ifx, --imxfx	: Set image effect (see Notes)
-cfx, --colfx	: Set colour effect (U:V)
-mm, --metering	: Set metering mode (see Notes)
-rot, --rotation	: Set image rotation (0-359)
-hf, --hflip	: Set horizontal flip
-vf, --vflip	: Set vertical flip
-roi, --roi	: Set region of interest (x,y,w,d as normalised coordinates [0.0-1.0])
-ss, --shutter	: Set shutter speed in microseconds
-awbg, --awbgains	: Set AWB gains - AWB mode must be off
-drc, --drc	: Set DRC Level (see Notes)
-st, --stats	: Force recomputation of statistics on stills capture pass
-a, --annotate	: Enable/Set annotate flags or text
-3d, --stereo	: Select stereoscopic mode
-dec, --decimate	: Half width/height of stereo image
-3dswap, --3dswap	: Swap camera order for stereoscopic
-ae, --annotateex	: Set extra annotation parameters (text size, text colour(hex YUV), bg colour(hex YUV), justify, x, y)
-ag, --analoggain	: Set the analog gain (floating point)
-dg, --digitalgain	: Set the digital gain (floating point)
-set, --settings	: Retrieve camera settings and write to stdout


Notes

Exposure mode options :
off,auto,night,nightpreview,backlight,spotlight,sports,snow,beach,verylong,fixedfps,antishake,fireworks

Flicker avoid mode options :
off,auto,50hz,60hz

AWB mode options :
off,auto,sun,cloud,shade,tungsten,fluorescent,incandescent,flash,horizon

Image Effect mode options :
none,negative,solarise,sketch,denoise,emboss,oilpaint,hatch,gpen,pastel,watercolour,film,blur,saturation,colourswap,washedout,posterise,colourpoint,colourbalance,cartoon

Metering Mode options :
average,spot,backlit,matrix

Dynamic Range Compression (DRC) options :
off,low,med,high
Merekam Video
Untuk melakukan perekaman video, anda bisa menggunakan perintah raspivid. Contoh, gunakan perintah berikut.
raspivid -o ~/Videos/videoku.h264Perintah diatas akan merekam video selama 5 detik dan di simpan di folder ~/Videos dengan nama videoku.h264. Anda bisa membuka folder tersebut dan memainkan video dengan VLC.
Untuk waktu yang spesifik, misal 10 detik, anda bisa menggunakan opsi -t diikuti dengan jumlah mili detik. Misalnya pada perintah di bawah ini.
raspivid -o ~/Videos/video10s.h264 -t 10000Perintah diatas akan merekam video selama 10 detik (10000 ms) dan akan di simpan di folder ~/Videos/
Untuk mendapatkan opsi lainnya anda bisa menggunakan perintah di bawah ini.
raspivid 2>&1 | lessDan berikut adalah opsi yang tersedia pada perintah raspivid.
"raspivid" Camera App (commit 7cbfbd38d982 Tainted)

Display camera output to display, and optionally saves an H264 capture at requested bitrate


usage: raspivid [options]

Image parameter commands

-b, --bitrate	: Set bitrate. Use bits per second (e.g. 10MBits/s would be -b 10000000)
-t, --timeout	: Time (in ms) to capture for. If not specified, set to 5s. Zero to disable
-d, --demo	: Run a demo mode (cycle through range of camera options, no capture)
-fps, --framerate	: Specify the frames per second to record
-e, --penc	: Display preview image *after* encoding (shows compression artifacts)
-g, --intra	: Specify the intra refresh period (key frame rate/GoP size). Zero to produce an initial I-frame and then just P-frames.
-pf, --profile	: Specify H264 profile to use for encoding
-td, --timed	: Cycle between capture and pause. -cycle on,off where on is record time and off is pause time in ms
-s, --signal	: Cycle between capture and pause on Signal
-k, --keypress	: Cycle between capture and pause on ENTER
-i, --initial	: Initial state. Use 'record' or 'pause'. Default 'record'
-qp, --qp	: Quantisation parameter. Use approximately 10-40. Default 0 (off)
-ih, --inline	: Insert inline headers (SPS, PPS) to stream
-sg, --segment	: Segment output file in to multiple files at specified interval <ms>
-wr, --wrap	: In segment mode, wrap any numbered filename back to 1 when reach number
-sn, --start	: In segment mode, start with specified segment number
-sp, --split	: In wait mode, create new output file for each start event
-c, --circular	: Run encoded data through circular buffer until triggered then save
-x, --vectors	: Output filename <filename> for inline motion vectors
-if, --irefresh	: Set intra refresh type
-fl, --flush	: Flush buffers in order to decrease latency
-pts, --save-pts	: Save Timestamps to file for mkvmerge
-cd, --codec	: Specify the codec to use - H264 (default) or MJPEG
-lev, --level	: Specify H264 level to use for encoding
-r, --raw	: Output filename <filename> for raw video
-rf, --raw-format	: Specify output format for raw video. Default is yuv
-l, --listen	: Listen on a TCP socket
-stm, --spstimings	: Add in h.264 sps timings
-sl, --slices	: Horizontal slices per frame. Default 1 (off)


H264 Profile options :
baseline,main,high

H264 Level options :
4,4.1,4.2

H264 Intra refresh options :
cyclic,adaptive,both,cyclicrows

Raw output format options :
yuv,rgb,gray

Raspivid allows output to a remote IPv4 host e.g. -o tcp://192.168.1.2:1234or -o udp://192.168.1.2:1234
To listen on a TCP port (IPv4) and wait for an incoming connection use the -l option
e.g. raspivid -l -o tcp://0.0.0.0:3333 -> bind to all network interfaces,
raspivid -l -o tcp://192.168.1.1:3333 -> bind to a certain local IPv4 port

Common Settings commands

-?, --help	: This help information
-w, --width	: Set image width <size>
-h, --height	: Set image height <size>
-o, --output	: Output filename <filename> (to write to stdout, use '-o -'). If not specified, no file is saved
-v, --verbose	: Output verbose information during run
-cs, --camselect	: Select camera <number>. Default 0
-md, --mode	: Force sensor mode. 0=auto. See docs for other modes available
-gps, --gpsdexif	: Apply real-time GPS information to output (e.g. EXIF in JPG, annotation in video (requires libgps.so.22)

Preview parameter commands

-p, --preview	: Preview window settings <'x,y,w,h'>
-f, --fullscreen	: Fullscreen preview mode
-op, --opacity	: Preview window opacity (0-255)
-n, --nopreview	: Do not display a preview window

Image parameter commands

-sh, --sharpness	: Set image sharpness (-100 to 100)
-co, --contrast	: Set image contrast (-100 to 100)
-br, --brightness	: Set image brightness (0 to 100)
-sa, --saturation	: Set image saturation (-100 to 100)
-ISO, --ISO	: Set capture ISO
-vs, --vstab	: Turn on video stabilisation
-ev, --ev	: Set EV compensation - steps of 1/6 stop
-ex, --exposure	: Set exposure mode (see Notes)
-fli, --flicker	: Set flicker avoid mode (see Notes)
-awb, --awb	: Set AWB mode (see Notes)
-ifx, --imxfx	: Set image effect (see Notes)
-cfx, --colfx	: Set colour effect (U:V)
-mm, --metering	: Set metering mode (see Notes)
-rot, --rotation	: Set image rotation (0-359)
-hf, --hflip	: Set horizontal flip
-vf, --vflip	: Set vertical flip
-roi, --roi	: Set region of interest (x,y,w,d as normalised coordinates [0.0-1.0])
-ss, --shutter	: Set shutter speed in microseconds
-awbg, --awbgains	: Set AWB gains - AWB mode must be off
-drc, --drc	: Set DRC Level (see Notes)
-st, --stats	: Force recomputation of statistics on stills capture pass
-a, --annotate	: Enable/Set annotate flags or text
-3d, --stereo	: Select stereoscopic mode
-dec, --decimate	: Half width/height of stereo image
-3dswap, --3dswap	: Swap camera order for stereoscopic
-ae, --annotateex	: Set extra annotation parameters (text size, text colour(hex YUV), bg colour(hex YUV), justify, x, y)
-ag, --analoggain	: Set the analog gain (floating point)
-dg, --digitalgain	: Set the digital gain (floating point)
-set, --settings	: Retrieve camera settings and write to stdout


Notes

Exposure mode options :
off,auto,night,nightpreview,backlight,spotlight,sports,snow,beach,verylong,fixedfps,antishake,fireworks

Flicker avoid mode options :
off,auto,50hz,60hz

AWB mode options :
off,auto,sun,cloud,shade,tungsten,fluorescent,incandescent,flash,horizon

Image Effect mode options :
none,negative,solarise,sketch,denoise,emboss,oilpaint,hatch,gpen,pastel,watercolour,film,blur,saturation,colourswap,washedout,posterise,colourpoint,colourbalance,cartoon

Metering Mode options :
average,spot,backlit,matrix

Dynamic Range Compression (DRC) options :
off,low,med,high
Kesimpulan
Penggunaan kamera di Raspberry Pi sangatlah mudah. Raspbian sudah menyediakan perintah yang lengkap untuk pengambilan gambar dan perekaman video. Aplikasi kamera raspberry pi bisa di gunakan untuk kamera cctv, publish ke youtube dengan rstp, dan bahkan bisa di buat kamera pintar seperti untuk pengenalan objek dan pengenalan wajah.
Ikuti terus TeknoTut untuk mendapatkan artikel teknologi berkualitas.


